
How to start a successful blog in 2023 is a no-brainer. Why? Because you don’t have to be an expert to start a blog.
However, the average salary for a WordPress developer in the Philippines remains over ₱40,000 a month. It means the demand for blog developers is high. Many bloggers still hire other people to create their sites.
As an aspiring Filipino blogger, you don’t need to spend that much.
A lot of blogging platforms are created for non-technical people. They come with an intuitive and user-friendly interface anybody can operate.
We’ve crafted this article to help new Filipino bloggers become successful without breaking the bank.
Why Start Blogging

Blogging allows you to earn decent money without working from 9-5. You don’t have a boss. And believe it or not, you can earn up to 150,000 pesos a month in blogging.
Blogging is the best way to earn passive income that can change your life. If you want to retire young and spend quality time with your family, consider blogging.
What is Needed to Start a Successful Blog

You only need two things to start a blog:
- Domain name (this will be the name of your blog, i.e. Google.com, passiveincomeblogging.ph)
- Web hosting ( to make your site live online)
See how easy it is to get you started creating a blog?
We assure you can create a blog in less than 30 minutes.
We will guide you from scratch until you create a stunning website.
In this blog post, we will discuss:
- How to Choose a Niche
- How to Come up With the Best Blog Name
- Where to Buy the Best Domain for Your Blog
- What is the Best Blogging Platform
- What is the Best WordPress Hosting Provider
- How to Connect Your Domain to a Hosting Service
- How to Write Your First Blog Post
- How to Add Optimized Images to Your Blog
- How to Publish Your Post and Share it to Social Media
- How to Embed Youtube Videos to Your Blog Post
- What are Blog Content Alternatives
- How to Keep Your Blog Updated With Trends
- How to Use AI Tools in Outlining Blog Posts
- How to Use Facebook, Youtube, Tiktok and Instagram to Bring Traffic to Your Blog
- How to Monetize Your Blog
- How to do SEO and on-page Optimization
Let’s start!
How to Choose a Niche

A niche is a topic or area of interest you want to focus on.
As a new blogger, choosing the right niche must be your top priority. It will help people find your site when done right.
Niche accounts for 20% of the efforts needed to generate traffic.
Wix.com listed over a hundred popular niche ideas. Some of the top blog niches include finance, business, marketing, sales, and technology.
But you must be careful in choosing a niche. Remember, your goal is to drive high traffic.
Consider the following in choosing a blog niche:
- A topic you’re most passionate about
- High traffic potential (something people will find interesting)
- Low Keyword Difficulty (the chance of ranking your posts on Google’s first page).
The first consideration is subjective. But the remaining two require thorough research.
You can use trusted websites such as Google Trends to check the popularity of a niche (keyword). Ubersuggest is also an excellent tool for measuring topic difficulty.
After figuring out the right niche, think of a sub-niche. A sub-niche is a smaller segment of your niche. In short, a sub-niche is more specific.
For example, your niche is ‘food.’ You can narrow it down to ‘veganism’ (sub-niche). This will make you write blog posts that target a more specific audience. As a result, it will bring higher web traffic.
How to Come Up With the Best Blog Name

You need a catchy blog name to get more traffic.
With over 500 million blogs on the internet, picking a blog name must not be a miss or hit.
You need the right combination of science and art to create the best name for your blog. But then again, you don’t need to be an expert to know the tricks.
We will reveal the secrets of creating the best blog name for FREE!
1. Know Your Existence– What are you blogging about? What kind of business you’re into? What is the message that you want to convey? These are some important considerations when formulating a blog name.
A blog name should enhance the aesthetic of your blog. It should be descriptive with your posts. And most importantly, it should be consistent with your niche.
Moreover, a blog name should be FLEXIBLE. This should give you enough leeway when writing content on another sub-niche.
Lauren Toyota’s ’Hot for Food’ is an example of a great blog name. The name sounds perfect with its cooking niche. It is flexible as well. When Lauren starts producing cookware content, ’Hot for Food’ will still make sense.
2. Target Audience– Your target audience is your market. Therefore, you should use a blog name relevant to their needs and interests.
For example, if you see The Children’s Place, you will know that this online store targets parents. This site deserves a click for parents who want to give their children something. And that’s where traction of organic visitors happens.
3. Do Research- You will never go wrong if you do research. Study what leading blogs in your niche are doing. Get inspiration from them and do better.
Limit your blog name to 1 to 3 words. This will keep your blog name easy to remember.
If you’re blogging about Technology, check out TechCrunch. From the name alone, you will know that this site produces content about technology. The blog name is short, which helps a lot in name recall.
4. Your Brand in Mind- You should use a blog name related to your brand. Also, ensure your brand messaging is consistent across your landing page, content, and social media posts. You must ‘own’ even the colors, fonts, and tag lines you use. This way, you can establish your identity.
One example, is the Panlasang Pinoy. You will notice that the site uses a family of fonts in its content. So, there is consistency. Moreover, the color scheme is coherent as well—no doubt why this is one of the top blogs in the Philippines.
5. Say and Spell- Your blog name should be easy to say and spell. The more wordy your blog name is, the harder your audience can remember your site.
Only use simple but witty words in your blog name.
When In Manila, 8list.ph, Click the City, and Panlasang Pinoy are some of the Philippines’ top blogs. See how simple these blog names are?
Where to Buy the Best Domain for Your Blog

You need a domain so people can find your blog online. It acts like an address—examples: Google.com, passiveincomeblogging.ph, and Amazon.com.
Don’t confuse a domain with a website. They are not the same.
Website pertains to a group of linked web pages under a single domain. In contrast, the domain serves as the address of a website.
A study of Growth Badger shows that ‘.com’ remains the most trusted domain extension. While ‘.co’ and ‘.org’ got the second and third spots, respectively.
According to Shopify, domain names, extensions, and keywords are crucial aspects of SEO. Thus, no matter how ‘killer’ your content, your blog may get poor traffic if you use the wrong domain.
Will people trust domains such as discounted-cheap-premium-jeans.net or freeshippinginphforlife-sale.biz?
Most probably, not.
But if you see Lazada.com, Shopee.com, or ShopSM.com, you know these sites are legit. As a result, you will stay longer on these sites and may purchase an item.
That’s how the right domain can bring organic traffic.
There are more than 300 million active domains on the internet. And daily, 33,000 domains are added.
We gathered data on the top three sites to buy the best domain in the Philippines.
Dynadot
Dynadot is an excellent option if you want to buy the best domain in the Philippines.
Dynadot’s main pitch is to make domain registration easy and affordable.
Did they live up to their promise? Let’s check!
| Top Domain Extensions | Registration | Transfer | Renewal |
| .com | $10.99 (610.43 Pesos) /year | $10.99 (610.43 Pesos) /year | $10.99 (610.43 Pesos) /year |
| .net | $10.99 (610.43 Pesos) /year | $10.99 (610.43 Pesos) /year | $10.99 (610.43 Pesos) /year |
| .org | $8.99 (499.03 Pesos) /year | $10.99 (610.43 Pesos) /year | $10.99 (610.43 Pesos) /year |
| .biz | $5.99 (332.50 Pesos) /year | $15.99 (887.60 Pesos) /year | $15.99 (887.60 Pesos) /year |
| .co | $10.99 (610.03 Pesos) /year | $24.99 (1,387.14 Pesos) /year | $24.99 (1,387.14 Pesos) /year |
Pros:
- Simplified domain registration
- More TLD Options
- No hidden charges
- No annoying upsells
Cons:
- Unclear steps (after registration)]
- Limited complementary products
NameCheap
NameChamp is popular due to its budget-friendly domains that can outrank competitors.
To date, NameChamp has over 11 million users. Additionally, the company hosts more than three million domain names.
Here’s more that you should learn about NameChamp.
| Top Domain Extensions | Registration | Transfer | Renewal |
| .com | $9.58 (531.77 Pesos) /year | $9.78 (542.87 Pesos) /year | $14.58 (809.31 Pesos) /year |
| .net | $11.98 (664.99 Pesos) /year | $11.98 (664.99 Pesos) /year | $14.98 (831.51 Pesos) /year |
| .org | $7.48 (415.20 Pesos) /year | $10.98 (609.44 Pesos) /year | $14.98 (831.51 Pesos) /year |
| .io | $39.98 (2,219.09 Pesos) /year | $41.98 (2,330.10 Pesos) /year | $44.98 (2,496.66 Pesos) / year |
| .co | $9.48 (526.20 Pesos) /year | $24.98 (1,386.54 Pesos) /year | $28.98 (1,608.56 Pesos) /year |
Pros:
- High uptime rate
- Free website migration
- Full refund if not contented
- Fast loading time
Cons:
- No call center support
- Limited data centers
Dot.Ph
Dot. Ph has been in the business since 1989. It is based in the Philippines and specializes in web design, shared web hosting, SSL certificates, VPS servers, and domain name registration.
Dot.Ph did not disclose the price for a specific TLD on its homepage. However, we will provide a general price estimate if you buy a top-level domain from this site.
Dot.Ph Top Level Domains (TLDs) | Cost (1 year) | Cost (2 years) | Cost (5 years) | Cost (10 years) |
| $38.00 (2,106.34 Pesos) | $70.00 (3,880.10 Pesos) | $175.00 (9,700.25 Pesos) | $350.00 (19,406.45 Pesos) |
Pros:
- Virtual Private Servers (VPS) are equipped with 1TB of redundant storage
- Advanced SSL certificate plans
- Offers a 5-day incremental backup
- Reliable and fast hosting speed
Cons:
- Hosting plans are expensive
- No free trial
- No money-back guarantee
We highly recommend these sites if you want to buy the best domain. Our list is tailored to the needs of Filipino bloggers. We’ve presented the pros and cons, but the decision is yours.
What is the Best Blogging Platform

More than 600 million blogs are live on the internet. In addition, more or less 7 million blog posts are published daily.
With these overwhelming stats, will you rank?
You can rank on Google’s first page using the right blogging platform.
There are lots of blogging platforms online. You must carefully research to find the best platform for your blog.
This easy-to-follow guide will help you find the best blogging platform to get more traffic.
1. WordPress
WordPress fuels 43% of the world’s websites. Furthermore, it gets over 75 million new comments every month.
You have two WordPress options: WordPress.com and WordPress.org. While they have the same name, these platforms are different.
WordPress.com is a hosted platform. This is perfect for bloggers who don’t consider monetizing their blogs. On the other hand, WordPress.org is self-hosted and is recommended for bloggers who want to earn from their content.
Pros:
- Free and Open- source
- No coding skills required
- Thousands of themes available
- Highly customizable
- Easy plugin installation
Cons:
- It gets more expensive as new features are added
- Plugin conflicts easily disrupt the site
2. Blogger
Another prominent blogging platform is Blogger. You can use this platform even if you don’t know how to code. This employs a user-friendly drag-and-drop interface.
Blogger is famous due to its easy installation. Also, it provides a highly secured Google integration service.
Pros:
- Free
- Simple AdSense integration
- Built-in analytics (doesn’t need plugins)
- User-friendly interface
Cons:
- Not suited for business use
- Outdated user interface and features
3. Wix
Wix provides bloggers with a professional-looking website for FREE.
Unlike other free blogging platforms, Wix covers businesses. It developed tools that help business websites rank high on search results.
Wix is perfect for startups. You can upgrade to premium plans if you want to enjoy more features.
Pros:
- Has tons of templates available
- Simple drag-and-drop user interface
- Fast site speed
- Built-in SEO management
Cons:
- Annoying free plan ads
- Analytics and tracking need a paid plan
4. Medium
You should consider Medium if you are not tech-savvy. Its UI is easy, and no coding is involved.
Medium mainly eyes audiences who are looking for quality content. It did not give much emphasis on the aesthetics.
This platform attracts around 85-100 million monthly active users.
Pros:
- High domain authority
- Easy to setup
- Built-in SEO features
- Custom domains
Cons:
- Poor Analytics
- Ineffective in lead generation
5. Squarespace
Squarespace is another user-friendly blogging platform we recommend for Filipino bloggers. Aside from its easy interface, Squarespace is SEO-ready as well. This means it will be easier for your blog to rank high on search engines.
Pros:
- Drag and drop user interface
- Attractive templates
- No plugins required
- Allows content scheduling
Cons:
- Expensive paid plans
- Slow site speed
These are the best blogging platforms we highly recommend for Filipino bloggers. While we kept our list objective, we suggest aspiring Filipino bloggers to choose WordPress (WordPress.org). Why? Because WordPress is the king of blogging!
What is the Best WordPress Hosting Provider
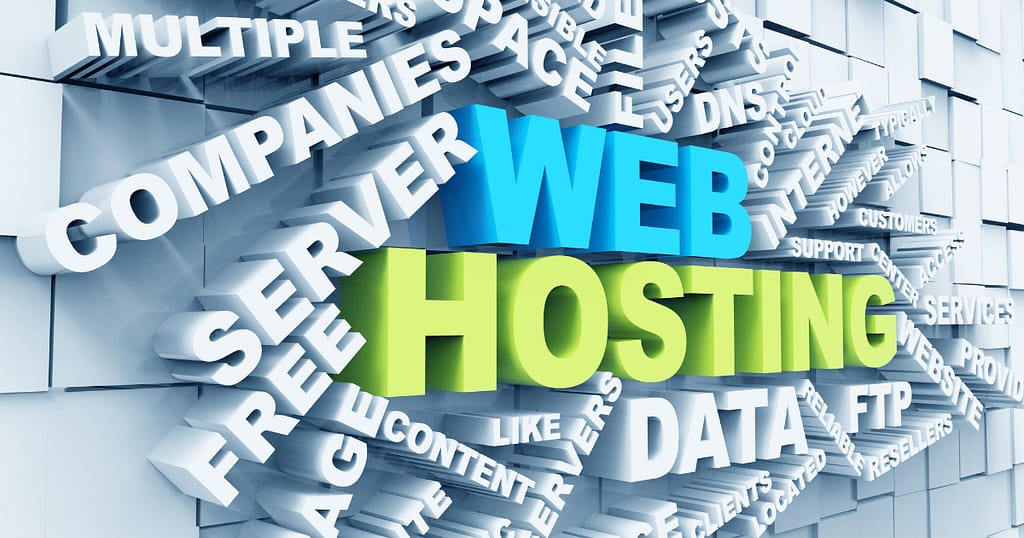
Whether you’re an expert or a novice, you must use the best WordPress (WordPress.org) hosting service to be successful in blogging.
A web host keeps your blog storage secure. Also, it handles the web traffic and dictates your website’s uptime rate.
WordPress is the world’s most popular blogging platform. That is why the majority of hosting companies offer plans that are compatible with WordPress.
But you should not settle for less.
We made this ultimate guide for you to know the best hosting service for your WordPress site.
1. InMotion – Do you want a WordPress host that will make your website 20x faster? It’s not impossible with InMotion.
Moreover, its hack and malware protection, SSL, and DDoS are solid punches to ensure your site is safe from cyberattacks. We highly recommend InMotion as the best hosting service for new Filipino bloggers.
InMotion Hosting Specifications (1 year)
| Top 5 Features | Core(193.38 PHP/mo.) | Launch(387.32 PHP/mo.) | Power(387.32 PHP/mo.) | Pro(830.65 PHP/mo.) |
| Disc Space | 100 GB (SSD) | Unlimited NVMe SSDs | Unlimited NVMe SSDs | Unlimited NVMe SSDs |
| Websites Supported | 2 Websites | Unlimited Websites | Unlimited Websites | Unlimited Websites |
| Bandwidth | Unlimited | Unlimited | Unlimited | Unlimited |
| Email Accounts | 10 Email Addresses | Unlimited Email Addresses | Unlimited Email Addresses | Unlimited Email Addresses |
| Dedicated IP Address | Available | Available | Available | Available |
2. bluehost – If the price is low, you will quickly get lured, but what about the quality?
Bluehost is known to provide affordable WordPress hosting plans without compromising a website’s performance. You can also rely on its expert customer service personnel if you have concerns.
Bluehost Hosting Specifications (1 year)
| Top 5 Features | Basic(163.47 PHP/mo.) | Plus(302.00 PHP/mo.) | Choice Plus(302.00 PHP/mo.) | Pro(772.85 PHP/mo.) |
| Disc Space | 10 GB (SSD) | 40 GB (SSD) | 100 GB (SSD) | 100 GB (SSD) |
| Websites Supported | 1 Website | Unlimited websites | Unlimited websites | Unlimited websites |
| Bandwidth | Unmetered | Unmetered | Unmetered | Unmetered |
| Email Accounts | 5 | Unlimited | Unlimited | Unlimited |
| Dedicated IP Address | Not Available | Not Available | Not Available | Available |
3. Hostinger – An affordable web hosting service with a fast loading time, that’s Hostinger.
Hostinger guarantees high uptime to bring the most comfortable experience to your visitors.
Hostinger’s simple interface is also a game-changer.
Hostinger Hosting Specifications (1 year)
| Top 5 Features | Premium (165.80 PHP/mo.) | Business (221.25 PHP/mo.) | Cloud Startup(553.95 PHP/mo.) |
| Disc Space | 100 GB SSD | 200 GB SSD | 300 GB SSD |
| Websites Supported | 100 Websites | 100 Websites | 300 Websites |
| Bandwidth | Unlimited Bandwidth | Unlimited Bandwidth | Unlimited Bandwidth |
| Email Accounts | 1 Free Email | 1 Free Email | 1 Free Email |
| Dedicated IP Address | Not Available | Not Available | Available |
4. Hostgator – It provides the best shared hosting packages. Hostgator’s paid plans are very affordable and reliable. With 99.9% uptime, unmetered bandwidth, and unlimited storage, Hostgator is another excellent option.
Hostgator Shared Hosting Specifications (1 year)
| Top 5 Features | Hatchling Plan(152.50 PHP/mo.) | Baby Plan(194.09 PHP/mo.) | Business Plan(291.13 PHP/mo.) |
| Disc Space | 10 GB | 40 GB | Unlimited |
| Websites Supported | 1 website | Up to 5 websites | Unlimited Websites |
| Bandwidth | Unmetered Bandwidth | Unmetered Bandwidth | Unmetered Bandwidth |
| Email Accounts | 1 Email Included | 1 Email Included | 1 Email Included |
| Dedicated IP Address | Not Available | Not Available | Available |
5. GoDaddy – GoDaddy offers free domain registration for your full term (1- 3 years). This offer is a game-changer as most of its competitors only offer a free domain in the first year. Additionally, GoDaddy guarantees 99.9% uptime or take your money back.
GoDaddy Hosting Specifications (1 year)
| Top 5 Features | Managed WordPress Basic(169.00 PHP/mo.) | Managed WordPress Deluxe(249.00 PHP/mo.) | Managed WordPress Ultimate(329.00 PHP/mo.) | Managed WordPress E-commerce(1,099.00 PHP/mo.) |
| Disc Space | 20 GB SSD storage | 40 GB SSD storage | 60 GB SSD storage | 80 GB SSD storage |
| Websites Supported | 1 Website | 1 Website | 1 Website | 1 Website |
| Bandwidth | Unmetered | Unmetered | Unmetered | Unmetered |
| Email Accounts | Free Professional Email | Free Professional Email | Free Professional Email | Free Professional Email |
| Dedicated IP Address | Not Available | Not Available | Not Available | Not Available |
How to Install Your WordPress Domain to a Hosting Service

InMotion
- Go to Cpanel.
- Select WordPress under Scripts.
- Click ‘Install Now.’
- Select the correct domain name.
- Fill out Site Name and Site Description.
- Key in Admin Credentials (username and password).
- Uncheck default plugins (it is recommended to install them later).
- Click ‘Install.’
Bluehost
- Visit Bluehost.com and choose your hosting plan.
- Choose ‘Create a New Domain’ or ‘Use a Domain You Own’ if you have an existing one.
- You will be redirected to a window where you will confirm the hosting plan, input personal details and billing information.
- Log in again using your Bluehost account credentials.
- Click the ‘Create Your Website’ button.
- When you see the ‘Limitless Customization’ tab, click ‘Get Started.’
- Wait until the installation of WordPress is finished.
- After installation, go to the Bluehost dashboard and verify your email address (use the email you signed up for in Bluehost)
- Click the ‘Log Into WordPress’ button
- Activate and click ‘Launch Your Website.’
Hostinger
- Go to Hostinger.com’s dashboard.
- A window will appear, and you need to input the name of the website that you want to create.
- Type your email. Create a strong username and password.
- Choose the WordPress version you want (preferably the most updated version). Select ‘English’ as the language.
- Click ‘Install’
- You will be redirected to the Hostinger WordPress dashboard when the installation is done. This allows you to manage your site, such as adding SSL certificates, plugins, and have access to other WordPress tools.
Hostgator
- Create a Hostgator account.
- Login to Hostgator CPanel.
- Scroll down to ‘Software’ and click ‘WordPress Manager by Softaculous’.
- A new window will pop up; click ‘install.’
- Make sure that ‘https://’ is selected and that you input the right domain.
- Enter the ‘Site Name’ and ‘Site Description.’
- Input the username, password, and update your email address.
- Click ‘Install,’ and Hostgator will install WordPress under a new domain name.
GoDaddy
- Go to https://www.godaddy.com/en-ph/hosting/wordpress-hosting.
- Buy the hosting plan that you want.
- GoDaddy will check if the domain name you want is available.
- If the domain name you input is available, click ‘Select and Continue.’
- Create your GoDaddy Account (email, username, password).
- A payment page will appear. Click ‘Complete Purchase.’
- Scroll down and click ‘Manual WordPress Setup.’
- Create a strong username and password. Click ‘Continue.’
- GoDaddy will start creating your site
- Once done, click ‘View my Site’ to access your WordPress website.
- Click the ‘Add Domain’ button on top of the WordPress dashboard.
- Select your domain name and click ‘Attach.’
- GoDaddy will update your domain.
How to Write Your First Blog Post (on WordPress)

- Click ‘Post’ on the WordPress dashboard’s left side menu.
- Click ‘Add New’ (Posts).
- A blank post window will pop up.
- Start writing your content.
- If you want to add an image, click the ‘+’ (adding a block), go to ‘gallery,’ ‘media library,’ and click ‘upload files.’
- Put tags to highlight specific details related to your post.
- Proofread your content before you click ‘Publish.’
How to Add Optimized Images to Your WordPress Blog Post

Adding images to your post is an effective way to hook your readers. Also, photos are a seamless way to break walls of text in your content. It provides a breather to your readers.
However, you cannot just add an image the way you want it to be. You need to follow some rules to get the best result. Otherwise, the images that you add may hurt your site.
Always use copyright-free images. We recommend you use images from Canva to ensure quality and easy customizations.
Image Formats
You can use either JPEG or PNG images (sometimes GIF is also used). But we will focus on the two main formats: JPEG and PNG.
JPEG and PNG images are made up of pixels. You should be careful in dragging (resizing) images as they may get blurry if not done right.
JPEG is recommended for print and web content. JPEG allows you to convert a larger image (from a different format) with just a ‘little’ compromise on quality. Changes are not noticeable for smaller images.
On the other hand, PNGs have transparent backgrounds, which are perfect for designing web graphics. Unlike JPEGs, PNG retains all the image information after compression. Thus, you will have high-quality images.
Image Size
You need to scale (resize) the images you will use in your blog post. Otherwise, you will be using images with unnecessary pixels. And this will slow your site’s speed.
Also, remember that your visitors use various devices to view your site. You must consider that a particular image size might fit on one device but worse on another.
For example, a 4k image is perfect when you view it on a 27-inch monitor. However, when you view it on a mobile device incapable of handling images exceeding 400 pixels, the image will become ugly.
Do you want to ensure your images load fast on your desktop, tablet, and other mobile devices?
Check out our image size recommendations below:
- Blog Post (1200 x 630 pixels)
- Header Image (1048 x 250 pixels)
- Featured Image (Portrait 900 x 1200 pixels)
- Featured Image (Landscape 1200 x 900 pixels)
- WordPress background image (1920 x 1080 pixels)
- Logo (200 x 100 pixels)
- Thumbnail (150 x 150 pixels)
If you require custom image sizes, you can do it on WordPress by:
- Go to WordPress Dashboard
- Click ‘Settings’ then ‘Media.’
- Change the width and height in the Media Settings depending on your preference.
- Click ‘Save Changes’.
Image Compression
Website speed directly impacts your site’s bounce rate. In fact, a 32.3% bounce rate is recorded for websites with a 7-second delayed loading.
One way to make your site faster is to use compressed images. You can use many reputable online image compression tools before uploading a photo to your WordPress site.
WordPress Image Plugins
To make your job easier, use image optimization plugins. EWWW Image Optimiser and Resize Image After Upload are two of the most popular WordPress image optimization plugins.
Additional Image Optimization Tips
- Search engines use title tags to determine the kind of image that you upload on WordPress. Make sure to write a title tag that directly describes your image. For example, your image should be ‘small-grey-cat.jpg’ instead of ‘img_45632.jpg.’
- Alt tag (alternative text) is embedded in the HTML code to describe an image (example: a small grey cat walking). Alt tags help Google understand what your image is about in a MORE detailed way. Keying the proper Alt Tag in every image will help your site rank higher on search results.
How to Share Your WordPress Post to Social Media

Sharing your WordPress posts on different social media platforms is a great way to promote your new and existing content.
A study revealed that 71 % of consumers are more likely to buy items based on social media influence.
Learn how to share your WordPress posts on social media platforms with our easy guide.
- Activate Autosharing – Go to Tools – Marketing- Connections in the WordPress dashboard. Check the various services (social media platforms) available. Then, click ‘Connect’ and follow the instructions to connect to a particular platform.
- Post Auto-sharing – Auto-sharing options will become available in your next post after allowing ‘connection’ to a specific platform.
- Message Customization – You can also add a custom message in the post you want to share to social media platforms. To do this, click the Jetpack icon, then write your message.
How to Embed Youtube Videos to Your Blog Post (Easiest Way)

You need to embed videos in your content to attract more site visits.
There are several ways of adding a video to your WordPress content. But in this post, we will teach you the easiest way to do it- MANUALLY.
Below are the steps for manually adding images to a WordPress post:
- Copy the URL of the YouTube video you want to embed.
- Go to the post editor and point the mouse where you want to insert the video.
- Paste the YouTube URL. Done.
WordPress employs an intuitive technology (auto-embed feature) that automatically picks up the embedded code of YouTube URLs pasted on the WordPress Editor.
Once a video is added, you can edit it through the block toolbar and media settings. Some customizations include adjusting the video width (you can make it full width), modifying the alignment, and more.
The WordPress auto-embed feature is only applicable on whitelisted platforms, such as:
- YouTube
- Giphy
- Vimeo
- TED
View the complete list of WordPress’ whitelisted platforms here.
What are the Best Blogging Alternatives

A blogger may switch to other jobs for various reasons. Sometimes, you get too tired of writing blog posts. It drains your energy. Or you’re simply unhappy with it.
If you want to shift your career, there are a lot of blog content alternatives that you can try. But it does not necessarily mean that you abandon blogging for good. Maybe you just need a break.
Here are some of the most profitable blog alternatives:
1. Vlog- Video blogging (vlogging) gains a massive fanbase worldwide. Aside from being highly popular, vlogging is also a rewarding career. In the Philippines, an established vlogger can earn anywhere from PHP765,000 to PHP14 million monthly.
As a blogger, you can rebrand your blog posts and produce vlogs. It’s like hitting two birds with one stone.
YouTube is the best platform to upload your vlogs. This year, YouTube recorded over 80 million subscribers around the world.
Eventually, you can widen your reach by uploading to other popular social media sites. Among the top platforms where you can also upload your vlogs are Facebook, TikTok, Instagram, DailyMotion, Vimeo On Demand, and Twitter.
2. Podcast – Producing podcasts is another excellent alternative to blogging. If you turn your blogs into videos in vlogging, you will turn them into premium audio content in podcasting.
You only need a microphone and a podcast app, and you’re good to go.
On average, podcasters in the Philippines earn PHP 720 – PHP 1200 per 1000 downloads.
3. Produce Other Types of Content – As a blogger, you can do so much with your talent in writing. You can earn from writing e-books, online courses, web copy, and email newsletters.
4. Outsource Writers – Even expert bloggers can get overwhelmed. If this happens, outsource other writers to keep you at pace. You can hire legit writers from onlinejobs.ph or jobstreet.com.
Outsourcing writers don’t add pain. Instead, you can save money from it. You don’t need to pay taxes for these writers. Also, since they are independent contractors, you don’t have to pay them if you don’t give them a writing assignment.
5. Graphic Designer – If you are tired of blogging, be a graphic designer. Unlike blogging, you don’t need to be adept in writing to create graphics/ infographics. But you have to be creative.
What’s best about graphics designing is that it doesn’t require much research. You just have to translate a context into enticing designs, shapes, symbols, diagrams, or workflows.
According to Jobstreet.com. The average monthly salary of a graphic designer in the Philippines ranges between PHP 21,000 to PHP 31,000.
How to Keep Your Blog Updated With Trends

As a blogger, you must keep your posts fresh to entice readers.
You need to stay updated with the latest trends. Otherwise, your blog will become part of the good old days.
Below are some tips on how you can keep your blog posts brand new.
- Attend Events Relevant to Your Field – You will learn new things if you talk to people who share your niche. That is why you must frequently attend trade shows, meetups, and conferences. These events are a great way to expand your network. The wider the network that you have, the greater opportunities that await you.
- Subscribe to Publications – Another option to stay updated with the trends is to sign up for online publications. You can subscribe to well-known magazines and newsletters to know the latest updates on your field of interest.
- Follow Social Media Influencers – Ensure you follow famous social media influencers in your industry. You can find them on Twitter, Instagram, and LinkedIn. Following influencers ensure you will get updates right from the horse’s mouth.
- Be Active on Online Forums – Participate in various forums in your industry. Joining forums is a perfect opportunity to interact with people who share the same passions as yours.
- Google Alerts – You can also ask Google to let you know about the latest trends in your industry. All you have to do is set up Google Alerts. You just need to input relevant keywords of your industry, and you can start receiving news and updates.
How to Make a Content Calendar and Write Blog Posts Consistently

64% of the most successful companies worldwide include content calendars in their marketing strategy.
A content calendar helps you gather resources to publish a blog post on time.
But how to make a content calendar?
That’s what we will teach you.
- Create a Calendar Template – A content calendar keeps you on track and prevents not meeting deadlines. As a newbie, we recommend you start with a monthly content calendar.
You can use the monthly calendar to know the topics in advance. Therefore, you can also gather resources, research, and write drafts in advance.
- Brainstorm – As a new blogger; it is essential to benchmark. Visit those leading websites in your field and check their top-performing posts. Once you have the gist of the topics that can draw more traffic, think about how you can create better content.
- Organize Themes – You already identified the potential topics; the next thing is categorizing them. Consider your niche and prioritize topics according to relevance.
For example, local delicacies could be your top priority if you run a Filipino cooking blog. Eventually, you can shift to publishing content about world-class Filipino chefs.
- Frequency – Adhere to the content frequency (of publishing) if you want to get more organic traffic. You need to include this in your content calendar. If you publish twice a day, be consistent with it. This will keep the excitement of your visitors high.
How to Use AI Tools in Outlining Blog Posts

Around 12% of businesses employ AI for content creation. And in 2027, it’s projected that 80% of the global retail industry will rely on AI. As a Filipino blogger, this is something you need to face headway.
You can get content ideas from ChatGpt, ClickUp, QuillBot, Copy.ai, and other popular AI writing tools.
However, you should not let AI handle the entire content writing. You should add a human ‘touch.’ Remember, Google ranks sites based on E–E-A-T (expertise, experience, authoritativeness, and trustworthiness).
Follow our guide to use AI content writing tools the right way.
- Research the Best Keywords – Before you start writing (whether AI-aided or not), research for the best keywords relevant to your content. Keywords help a lot in SEO. Also, ensure your blog post answers your target market’s pain point.
- Ask AI – Now, you can ask AI to provide you with the best content idea. For example, you’re the owner of a virtual assistant agency in the Philippines trying to get more clients. In this case, you can enter a prompt like ‘Give me 5 article ideas on why it is best to hire VA in the Philippines.’
- Get an Outline -Identify the best result of the prompt ‘Give me 5 article ideas on why it is best to hire VA in the Philippines.’ After selecting a title, enter another prompt asking AI to give you a content outline.
- Start Writing – Use the AI-generated content outline in writing your blog post. Add real-life examples and data to amplify points. Strive to produce high-quality content to rank higher on Google.
- Refine – After writing your draft, you need to edit…edit…and…edit. You should optimize your post as much as possible. Adding a Frequently Asked Questions (FAQ) section will help. Also, make sure all the images are compressed and have the right title and alt tags.
How to Use Facebook, Youtube, Tiktok, and Instagram to Bring Traffic to Your Blog

You can earn 10 times if you have more than four social media accounts. Interesting, right?
As a new blogger, you must know the power of social media right from the get-go. You should use it to your advantage.
However, cross-posting on social media requires a proper way. If you don’t know the drill, this may cause more harm than good to your blog.
Check this definitive guide on how to use social media to increase your blog’s traffic.
Increase Engagement
You can gain good traction with followers by posting engaging content. This doesn’t mean you’ll be posting long-form copies. Try to be more creative.
For example, memes are more attractive, especially on social media platforms. Social Media Today focused on posting memes, and it significantly increased its web traffic.
In other words, posts all content that will catch the readers’ attention. Doing this regularly will get good traffic on your social media handles and your blog.
Most Web Traffic
Concentrate on social media platforms that drive most web traffic. Establish a good reputation on these sites, and your blog will also benefit.
According to GrowthBadger, Facebook remains the best platform for social media traffic. Aside from Facebook, you can also rely on Twitter.
On the other hand, Pinterest and Instagram are two social media platforms that are less effective in driving traffic to external sites.
Referral Links
Social media referral links also help increase your web traffic. You can do this by including blog links in your bio.
Add Links
You can also add external links to your social media posts. You can create an enticing snippet to attract your followers to read more on your sites.
Understand Algorithms
You must know how algorithms work in each social media platform you want to cross-post. You must consider this to ensure you post with the right frequency, topic, and interest.
For example, Facebook doesn’t like posting the same topic multiple times daily. Thus, to get better results, post a few and diversed high-quality content. In contrast, Twitter likes you to post your best articles (on the same topic) multiple times daily.
Social Media Groups
Joining social media groups in your industry helps increase your reach. You can comment on posts in your group and leave a relevant link to your blog. Do it seamlessly, and you will get more organic traffic.
Facebook, LinkedIn, and WhatsApp are the top social media platforms that provide group features.
How to Monetize Your Blog

Blogging in the Philippines is a lucrative career. If you want to spend more quality time with your family and make good money passively, blogging is the key.
Here are the top ways of monetizing your blog:
- Subscription-based articles
- Offer paid online courses
- Affiliate marketing
- Sponsored posts
- Advertisements
- Create ebooks
How to do SEO and On-page Optimization

SEO is a colossal task. But as a starting blogger, basic knowledge can make a huge difference.
Search Engine Optimization (SEO) helps Google understand your site. If your site is reputable and produces high-quality content, you will rank high on the search engine results page. On the other hand, if your SEO fails, no one will find your website.
Here’s how to do basic SEO and on-page optimizations:
- High-quality SEO content – Content is the king in on-page SEO. Before you start writing, research focus keywords and other related keywords. However, make sure these keywords are integrated naturally into your post.
- Include focus keyword in the Title – The focus keyword is the heart of your content. Make sure to include it in the title of your post. This will tell Google what your content is about upfront.
- Headers – You must also use headings. Headings help make reading easier. You can jump directly to the information you need through headings and subheadings.
- Meta Descriptions. Create the best meta description. It works like a snippet telling people what your post is all about. If your content has a good meta description, the higher the probability you will get more clicks.
- Images – You should write proper ‘alt texts’ and ‘alt tags’ for all the photos included in your post. Alt texts and alt tags will further help Google understand the intent of your post.
- URLs – URLs must be short to rank higher on Google. RankMath suggests URLs must be kept below 75 characters.
- Internal Links – Internal links are links within your website. The more internal links you add (ensure links are naturally related), the longer people stay on your page. And this will add a reputation to your site.
- Mobile-friendly – More than 55% of website traffic comes from mobile devices. That is why your blog must be mobile-friendly. Use themes and hosting services that prioritize mobile responsiveness.
- Site Speed – The site speed directly affects web traffic. The slower the site is, the lower its ranking on search engines.
Conclusion:
Blogging appears to be a daunting task. Well, it is. However, if you hold on to your dreams, there is no way that you’ll not succeed in blogging.
In this article, we laid out the fundamentals and the essential tricks to start blogging on the right foot. We know the Filipinos are world-class. We know that Filipinos can create blogs that rank.
We are excited to see your blogs land on the first page of search results. This comprehensive guide is an excellent tool for Filipino bloggers to reach great heights!